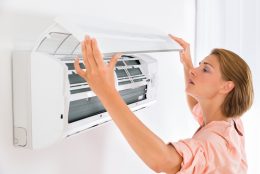
Listen to Your System
When your heating, ventilation and air conditioning (HVAC) system begins making unusual noises, you should pay attention to what it is trying to say. Certain sounds can indicate what is wrong with your HVAC system. Knowing the reason your system is making an unusual sound will help you recognize when it is time to call Cox Heating and Air Conditioning for HVAC repair.
Transition Your AC Unit From Fall to Winter
As old man winter starts nipping at your nose, it’s time to get your AC unit ready for the cold. Winter can bring different challenges than fall, so it’s important to take these few steps to ensure your AC unit will do well when the spring warms things up. Here’s what to do:
What Causes of Evaporator Coil Leaks in Your Clearwater Air Conditioner?
Evaporator coil leaks can reduce your A/C system’s energy efficiency and repairs can be expensive. Fortunately, there are some things you can do to minimize the causes of evaporator coil leaks in your Clearwater home.
Water condensation from the air conditioner is normal. Water vapor condenses and collects on the evaporator coil as the coil takes heat from the surrounding air. As the water builds up on the coil, it drips into a pan below and flows out of your house. The only time you need to worry is if the drain pan leaks or the drain pipe backs up and water spills onto the floor.
Leaks in the evaporator coil are a more expensive A/C problem than overflowing condensate drains. The air conditioner doesn’t burn refrigerant. It should maintain the same volume in a closed loop. If your HVAC tech has to add refrigerant during an annual maintenance visit, you probably have a leaky coil.
Causes of Evaporator Coil Leaks
Manufacturing defects and faulty installation are causes of evaporator coil leaks that occur in the first few months after a new system is put into service. These leaks can usually be fixed by tightening connections or re-soldering joints.
One of the other causes of evaporator coil leaks is formicary corrosion, which results when formic acid on the copper coil slowly eats tiny holes through the coil wall. Formic acid deposition is a result of the interaction of moisture on the coil with volatile organic compounds (VOCs) in your indoor air. VOCs get into your air from cleaning products, paint, new carpeting and other construction materials.
Preventing Evaporator Coil Leaks
There are a few steps you can take to prevent or delay evaporator coil leaks:
- Have A/C coils cleaned every year to minimize corrosive build-up on the copper tubing.
- Install ultraviolet (UV) lighting inside ductwork to neutralize VOCs in the air supply.
- Provide a fresh outdoor air supply via energy-exchanging vents.
- Minimize the use of VOCs inside your home.
For more information about causes of evaporator coil leaks, or for other home comfort concerns, call us at Cox Air Conditioning & Heating. We proudly serve the HVAC needs of those in the Clearwater and surrounding areas.
Image Provided by Shutterstock.com
Step-by-Step Instructions on How to Replace the Batteries in Your Home Thermostat
Many Tampa homeowners aren’t aware that they need to change their thermostat batteries on a regular schedule to avoid unexpected loss of air conditioning or heating service. Some thermostats are hard-wired to the house power supply and don’t have batteries, but most modern digital thermostats are battery operated. When it comes time for the change, homeowners need to know how to replace the batteries in a thermostat.
Since there are dozens of makes and models of thermostats in use, it’s impossible to create just one list of steps describing how to replace the batteries in a thermostat that will cover all situations. But, here are some general tips to follow:
- Read the owner’s manual that came with the thermostat for guidelines on how often to install new batteries and instructions for changing them.
- Unless the owner’s manual tells you otherwise, replace the batteries once a year. If you combine this task with other annual maintenance tasks such as replacing smoke alarm batteries, you’ll be less likely to forget to do it.
- Even without written instructions, changing thermostat batteries is a fairly straightforward process. First, carefully remove the cover or faceplate from the thermostat so you can see the batteries or the battery holder. Take note of the position of the batteries, so when you put new batteries in heir polarities are correct. Use new batteries that are the same type and voltage as the old ones. Put the new batteries in and replace the cover.
- Test the thermostat with the new batteries in place and reset the programming if necessary. Most newer programmable thermostat models have internal memories so the thermostat doesn’t lose its settings when the batteries are replaced.
If you’re lost on how to replace the batteries in a thermostat of your Tampa area home, contact Cox Air Conditioning & Heating. We’re here to help!
Image Provided by Shutterstock.com


Recent Comments